Hey! First of all, thank you for contributing to Cerberus. It's people like you that make open source software the success it is!
- Contributing to Cerberus
- First of all, what is Cerberus, and how does it work?
- Step by Step Breakdown of what is happening in the background
- Setting up your Environment
- Setting up Flutter
- Cloning the git repo and setting up the Flutter Project
- Creating the MongoDB Database
- Cloudflare Workers And Realm Sync
- Adding the Auth Key to your Flutter Project
- Compiling
Cerberus uses XChaCha20 and RSA to allow you to encrypt any file and send it across the web securly, without the need to share a password! No longer do you need to text the password to the recipient, or send an email with an attached RSA key. Instead, simply fire up Cerberus and type in the email of the recipient. Then send the encrypted file to the recipient, where all your friend needs to do is simply open up the file with Cerberus! No need to enter in a password, or import some RSA key!
Note, although I don't mention it in, all connections to the MongoDB are made using two Cloudflare Workers: Cerberus-Authentication-Cloudflare-Worker and Cloudflare-Workers-Keypair. I use the authentication worker to connect to the database and retrieve the user's email and hashed password, as well as POST that. The keypair workers retrieves and POSTs the user's public key and encrypted private key.
When someone creates an account, a pair of RSA keys are generated. The private key is encrypted with an AES256GCM key derived from the password. Then, the public and encrypted private keys are uploaded to a MongoDB. Meanwhile, the user's password is encrypted using the Argon2 password hashing scheme, and the hashed password is uploaded to the MongoDB database along with their email. Because of the way I implemented the password, there is no way to reset it in order to make sure no one can decrypt the private keys, including me. However, I am open to the potential of a recovery phrase the user can generate and use to recover their account in case of a forgotten password.
Once the user clicks the sign in button, the program connects to MongoDB and retrieves the hashed password based on the email supplied. Then, it compares the Argon2 hashes created by the password in the database, and the one the user supplied. If the hashes are the same, the program will login the user and pass the email and password to the next page. These are passed to allow the next page to download and decrypt the keys if needed.
When the user clicks the button to encrypt, a pop up appears that asks the email of the recipient. This is used to download the public key of the recipient, which is then used to encrypt the file at the same location where the original file was located. Note that Cerberus does not delete the original file!
First things first, a random Xchacha20.poly1305Aead key is generated, which encrypts the original file in memory. The Xchacha20 key is then encrypted with the recipient's RSA public key. In addition, the generated nonce is also encrypted with the public key. Finally, a new file is created which writes to the file in the following order in bytes:
- Encrypted Xchacha20 key
- The encrypted Nonce
- The MAC (Message Authentication Code)
- The encrypted contents of the file
When the user clicks the button to decrypt, a pop up appears asking the user to select the file that they want to decrypt. The program will only allow the user to select files with the .cerb extension to decrypt. The program will download the encrypted private key, and then decrypt it with the user's password, which was originally used to encrypt the private key with AES. After that, all the variables needed are created, the encrypted file is loaded into memory. The data is read in the following order:
- The Encrypted Xxhacha20 key
- The encrypted Nonce
- The MAC (Message Authentication Code)
- The encrypted contents of the file
To setup your environment, you will need to install flutter, as well as setting up MongoDB and the Cloudflare workers. To setup Workers, you will need npm.
First of all, make sure you have flutter installed (Flutter Installation Guide) and properly configured. For desktop development, each OS (Linux, Windows, and MacOS) have additional requirements that need to be installed before you can develop.
Once you've run flutter doctor and made sure that everything is all good (you don't need the Android SDK despite what flutter what might say as this project is currently desktop only), run the appropriate flutter config command to enable building for the desktop OS you are running.
Make sure to fork the repo first! Then clone your repo using git clone https://github.com/{user}/{repositoryName}.git or however you prefer to clone your repository.
Then in whatever IDE you like to use, navigate into the Cerberus (folder and run flutter pub get to download all the dependencies. Your IDE might also prompt you to run this command.)
Once you finish creating the Cloudflare Workers, you will need to rename .env.example to .env and fill in the AUTH_KEY field with your Workers authentication key.
https://www.mongodb.com/basics/create-database The free M0 tier will work just fine.
For sample data, once you've established the connection between your compiled project and your MongoDB database via Cloudflare Workers, you can simply create dummy accounts via the program.
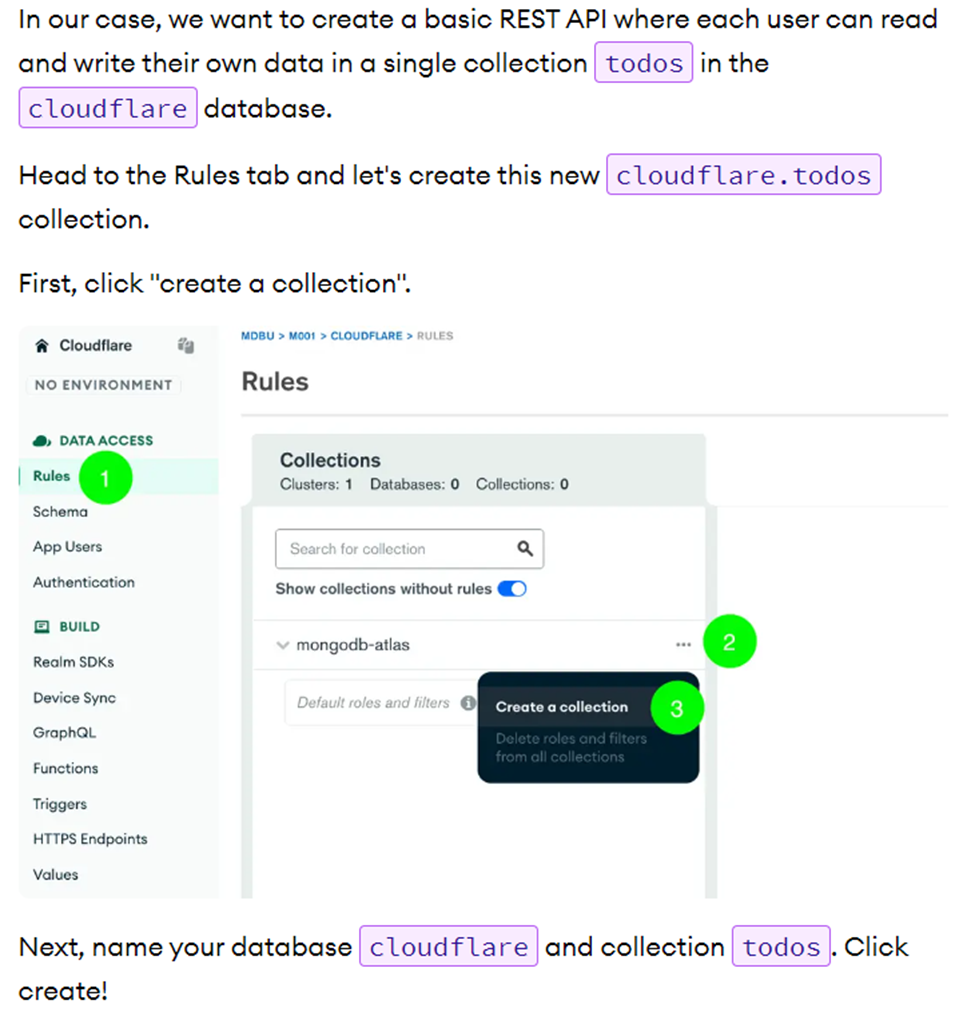
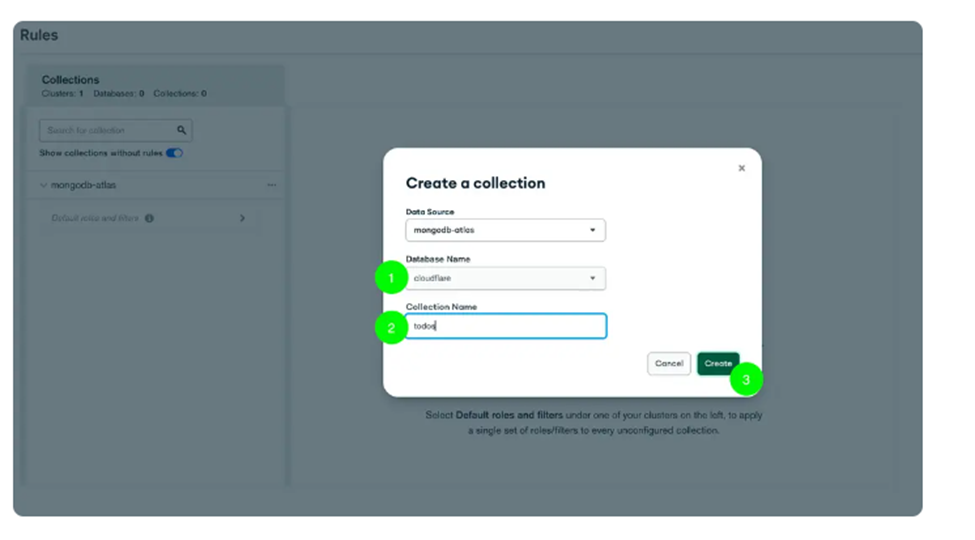
I used this guide to create my workers and my MonogoDB connections. For the most part it is exactly the same, minus some differences which I will mention here. https://www.mongodb.com/developer/products/atlas/cloudflare-worker-rest-api/
- You will need to set this up twice, once for the authentication worker and one for the keypair worker, although I use the same MongoDB Realm API Key for both workers
- Use my git repos instead, or fork your own copy: https://github.com/rohsaurus/Cerberus-Authentication-Cloudflare-Worker https://github.com/rohsaurus/Cloudflare-Workers-Keypair
- Although they name their table todos, the name isn't important. This is what I named my tables:
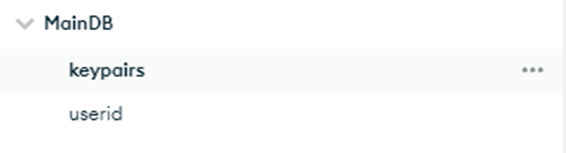
- For example, the tutorial names their database Cloudflare and the table todos, I name my database MainDB and the tables keypairs and userid.
- The installation of Wrangler in the tutorial is deprecated, instead use
npm install -g wrangler. - Once we are done setting up the Workers and the sync with MongoDB, feel free to test it with postman or the api tests included in MongoDB's git repo (I removed it from my repo to make it look cleaner).
I've provided an example file (.env.example) to show you what you need. Simply rename the file to .env (removing the example part) and paste in your authorization key, the same one that you used for postman or api tests (REALM API Key)
If all the steps above were successful, you should simply be able to run flutter run, or clicking the play button on your IDE. Let me know if you have any questions!
- Contributing to Cerberus
- First of all, what is Cerberus, and how does it work?
- Step by Step Breakdown of what is happening in the background
- Setting up your Environment
- Setting up Flutter
- Cloning the git repo and setting up the Flutter Project
- Creating the MongoDB Database
- Cloudflare Workers And Realm Sync
- Adding the Auth Key to your Flutter Project
- Compiling