Using JupyterHub
The server is a Dell 7920 located in the Hill Data Center. Physical access can be granted by the Networking and Operations Center.
Before proceeding, you might consider reading some advice for scientific computing:
https://jupyter.learlab.vanderbilt.edu/
Anyone can create an account, but an admin will need to activate the account once it has been created. Administrators can approve an account at the /hub/authorize location
- Go to https://jupyter.learlab.vanderbilt.edu/
- Click on 'sign up to create a new user'
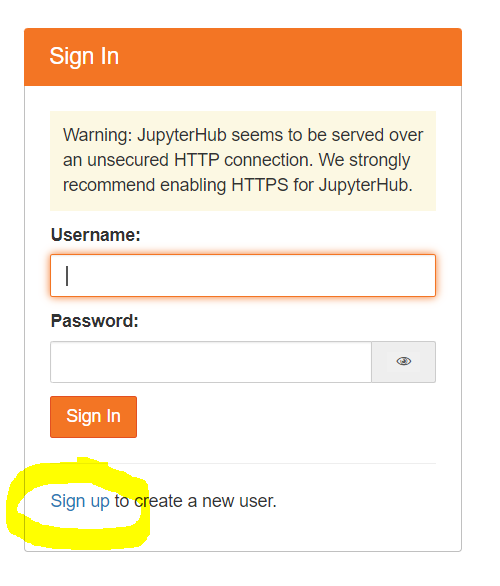
- Enter a username, email address, and password.
- Contact an administrator so they can approve your account. Give them this link in case they have forgotten where to go.
- Go back to https://jupyter.learlab.vanderbilt.edu/
- Sign in
Administrators can approve an account at the /hub/authorize location.
- Standard - use this for JupyterLab.
- RStudio - use this for RStudio.
- The RStudio interface does not provide a button to get back to JupyterHub.
- You can always use this URL if you need to switch to a different instance: https://jupyter.learlab.vanderbilt.edu/hub/home
- GPU - use this if you need a GPU.
- There are 3 GPUs
- If you try to use the GPU while all 3 are already in use, you will hit a resource allocation error. Get on Slack to see if someone can free up a GPU for you.
You will be automatically logged out after 3 hours of inactivity.
Every 10 minutes, JupyterHub will ping your notebooks to check their status. If they are not doing any work for 3 hours, JupyterHub will shut them down. Any objects stored in memory will be lost, so it is a good idea to save the output of any long-running processes to disk.
By default, packages will not persist across sessions. If you manually restart your jupyter instance or it stops for some other reason, your installed packages will be lost. See the environments section for details on creating a custom, persistent Conda environment.
The default environment comes preloaded with CUDA-enabled PyTorch and some basic packages. See the Appendix for details on reproducing the default environment.
You also have passwordless sudo for installing packages with apt. You won’t need this often.
While it is fine to use the default environment, any packages you install will be lost across sessions. It is good practice to use virtual environments to have more control over your packages. As a bonus, your virtual environments will persist across sessions!
You can create an environment named MY_ENV_NAME by cloning the base environment.
If you would prefer to start an environment from scratch, please note that all Python environments should include the package ipykernel. Additional packages are separated by a space:
conda create -n MY_ENV_NAME --clone base
conda create -n MY_ENV_NAME ipykernel scipy
If you included ipykernel in your environment specification, the environment should now be available in the list of kernels in the JupyterLab interface. It will also persist across sessions, because it is stored under /home/jovyan/conda_envs (persistent), whereas the default environment is stored in /opt/conda (ephemeral).
You can use the Jupyter GUI to switch between your environments. When you are on the terminal, the command is conda activate MY_ENV_NAME or source activate MY_ENV_NAME.
While possible, it is not simple to persist system installations across sessions (anything you install using sudo apt-get). You can check if a Conda package exists for your software. If there is a need for a package that must be installed with apt-get, please contact a server administrator. They will likely want to update the Docker image to include your required system package, which will then be available to all users.
Renv works seamlessly in most cases, but some packages have system-level dependencies that can cause issues in virtual environments. Please contact a server administrator if you run into issues with renv.
Some users have written Python scripts that are shared in ~/active-projects/scripts/
To use these scripts, first ensure that build-tools was installed. You can run conda install conda-build.
Then, run conda-develop ~/active-projects/scripts/PACKAGE_NAME/MODULE_NAME from within a Conda environment and you will be able to import that module from within the Conda environment where it was installed.
The file system is accessible through your Jupyter server.
When you login, you will have a personal, persistent filesystem. You will also have “active-projects” and “project-archive” directories.
-
Use your home folder for active projects. This appears as / in the JupyterLab interface, but the full path is /home/jovyan/work/. It is limited to 50GiB.
-
Use /home/jovyan/work/active-projects/ for collaborative projects and shared resources. Limited to 3,700GiB shared between everyone. Use descriptive names!
-
Use the /home/jovyan/work/project-archive/ folder for inactive/completed projects. This is 3,700GiB shared between everyone. Use descriptive names.
- ISO_8601_project_name
“Project” can be a specific set of research questions pertaining to a single manuscript, but it might also be a dataset or narrow line of inquiry that could lead to multiple manuscripts. Use descriptive filenames.
- ISO date format should reflect the time that the folder was moved to long-term storage, expressed as YYYY_MM_DD
- /data
- Raw text data
- Non-destructively pre-processed data (.spacy files)
- /bin
- Canonically used for compiled code
- In-house scripts and downloaded models can go here
- /results
- intermediate data as a result of cleaning or processing steps
- publication-ready figures, tables
- /src
- all code written for the project including .ipynb files
- /doc
- documentation of source code
- files related to manuscripts
Please be sure to backup all your important files to the cloud and/or your personal computer on a regular basis.
Your JupyterLab instance comes with a Git extension and Github CLI installed. But first, you will need to link the JupyterLab instance to a Github account.
From within Jupyter, open a terminal and run gh auth login.
Follow the prompts, as shown below.
- What account do you want to log into? --> Github.com
- What is your preferred protocol for Git operations? --> HTTPS
- Authenticate Git with your GitHub credentials? --> Yes
- How would you like to authenticate GitHub CLI? --> Login with a web browser
- Copy your one-time password (OTP).
- GitHub CLI will fail to open a browser for you, so you will need to navigate to https://github.com/login/device on your own.
- Paste your one-time password (OTP).
In addition to authorizing your Github account, you will want to specify your identity with git:
git config --global user.name "Your Name"
git config --global user.email "youremail@yourdomain.com"
You can use the graphic interface for Git that has been pre-installed to JupyterLab, or you can continue to use the CLI. I find that the GUI is a nice reminder to make frequent commits.
- Set the default branch to “main” instead of “master”:
- git config --global init.defaultBranch main
- You should probably change the “simplestaging” value to “true” in the Git extension settings.
Thanks to jupyter-server-proxy, you can run webapps from within JupyterHub. These webapps will be made available at /user/USER_NAME/proxy/PORT_NUMBER/
For example, Streamlit will by default listen on port 8501. A user (USER_NAME) can access a running Streamlit app at
https://jupyter.learlab.vanderbilt.edu/user/USER_NAME/proxy/8501/